From Calcium Powder Coating to Hardening and Sanding: How the “Surface Engineering” of a Decorative Molding Is Accomplished
In decorative moulding industry, people always focus on product style, dimensions and price, but they ignore one critical aspect regarding product quality:surface finishing. Because when install moulding on a wall, the customers sees and touches moulding surface every day, so they only can evaluate moulding product quality by product surface.
If the surface finishing is poor, even the best design or the lowest FOB price won’t prevent complaints, returns, or replacements at the end-user stage. This factory invests far more effort into surface coating processes than is apparent from the outside. This article explores exactly what a decorative molding undergoes—from raw substrate to finished product—during the surface finishing process.
1. Coating is more than just "applying a layer of paint"
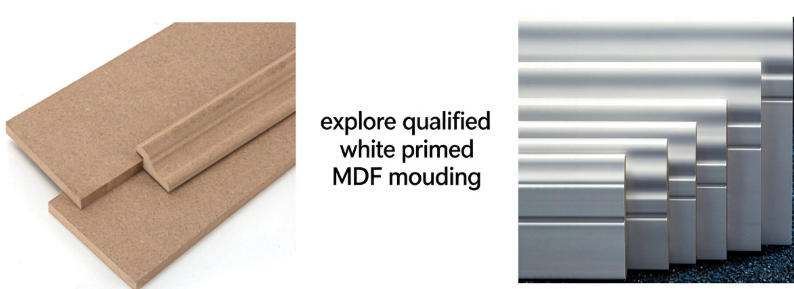
The traditional surface treatment method for decorative moldings is known as coating. Contrary to what many might imagine, this process is far more complex than simply “applying a layer of paint.” Fundamentally speaking, the coating process applies calcium-based compounds onto product surfaces. These compounds fill surface imperfections, mask blemishes, and smooth out irregularities, transforming rough, dull raw surfaces into a refined and uniform finish.This coating treatment, nevertheless, cannot be accomplished in a single application. The above describes the putty coating procedure for white primed MDF moulding.Factory standards mandate at least two coating applications, with brushing and sanding performed after each one. Brushing spreads the coating substance consistently across the workpiece, and sanding gets rid of grit, sharp protrusions and uneven spots. A genuine bond between the coating and base material can only be achieved by combining these operations, instead of letting the coating simply rest on top.
By the third coat, sanding is no longer required. Why? Since the first two paint layers, together with their corresponding brushing and sanding operations, build up a sufficiently even base. The third layer mainly delivers the top finish and full consistent coverage. If sanding at this process, it will damage the pre-formed smooth coating surface and wear down the coating. That will also weaken the white primed coating protective performance. After the third water-baser primer, no need other treatment,you can paint the moulding directly. That is not shortcut-taking,it is an accurate way to regular the coating framework.

2. The Truth Under the Magnifying Glass: Why "Looking Smooth" Doesn't Mean Truly Smooth
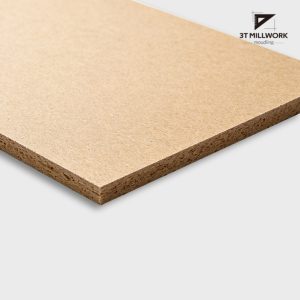
When buyers receive raw MDF boards, the surface may feel smooth with no obvious wood splinters. They might assume the quality is great. However, factory technicians know this smooth look is deceptive. If you look under magnification, the board surface is made of countless wood fibers. These fibers are pressed and glued when MDF is produced, but their ends still stick out and create small bumps and gaps. These tiny surface problems cause big issues during coating. Coating materials flow into the fiber gaps. The board soaks up the coating unevenly. This leads to color differences, rough spots in some areas and poor coating adhesion. To fix this problem, factories add enough binder to the coating mix. Binder does not only glue materials together. It also hardens the wood fibers on the surface while coating is applied. After fibers absorb the binder, they change from soft fibers that easily create fuzz to hard, stable fibers. In the next sanding step, sanding wheels can cleanly cut away these hard raised fiber tips. Soft fibers, however, will only get pressed flat or pulled when sanded. They cannot be fully removed. Using fiber hardening and sanding together effectively removes rough spots on the surface. This process sounds easy. But settings like binder ratio, coating amount, curing time and sanding pressure need plenty of production data. If we do not add enough binder, fibers cannot harden well. Fuzz will still appear after sanding. Too much binder will make the coating hard and easy to crack.The mill’s proprietary formula and process settings have been refined through numerous practical tests together with input from buyers.
3.The final coat: the factory-applied "topcoat" and the "bonding layer" within the installation system.
In addition to the calcium powder coating, the factory applies a layer of paint to the product’s surface.Internally, workers call this the “topcoat”, as it represents the concluding phase of production. After application, goods go straight to inspection and packing. Still, within the full on-site finishing system, this film acts more like a priming and bonding stratum. It is not meant to be the final decorative skin. Instead, it enables much stronger attachment between the base putty coat and the final decorative paint applied later on site. Once decorative moldings are installed on walls or ceilings, they typically require on-site painting—specifically, the application of the final topcoat. If the factory-supplied product featured only the calcium powder coating without this bonding layer, the adhesion between the final topcoat and the base layer would be insufficient. Over time, or in response to fluctuations in humidity and temperature, the topcoat would be prone to peeling or flaking off. Customers would then be forced to invest extra time and effort into applying a primer or bonding layer themselves before painting the topcoat—effectively shifting a manufacturing step onto the customer.
Initially, the factory did not apply this specific coating layer. However, as customer feedback accumulated, the factory realized that omitting it would reduce installation efficiency and compromise the final finish. Consequently, they decided to apply this “topcoat-like” layer to the products on a mass scale.Even though it carries the name “topcoat”, this layer works as a connecting bridge. It sticks securely to the underlying calcium powder putty layer and creates an optimal substrate for the finishing paint applied during on-site fitting. Thanks to this treatment, buyers may move straight to installation and final painting, removing the requirement for an extra primer coat. For commercial project purchasers, cutting out this separate procedure reduces labour expenses, time input and overall spending. For individual retail buyers, it simplifies installation work and lessens the chance of application mistakes.
4.A Flawless Finish: Conceal imperfections, but avoid applying it too thickly.
What is the ultimate goal of surface coating? The factory’s answer is this: the ideal state is a coating that effectively conceals product imperfections—such as surface blemishes and uneven coloration—without being excessively thick. This concept may seem straightforward, yet getting it right poses immense challenges. Covering flaws demands a specific coating depth. A too-thin film cannot conceal subsurface marks, uneven tones or fibre traces. On the flip side, an overly heavy coat brings new troubles. Such thick coating tends to split and flake when the product is fitted and put into service.This is particularly true in regions with significant temperature fluctuations or humidity changes, where internal stress concentrations within a thick coating lead to cracking during thermal expansion and contraction. Once cracking occurs, it not only ruins the product’s appearance but can also cause the coating to flake off, exposing the substrate and rendering the product a total loss.

The factory’s products avoid this issue because their control over coating thickness relies not on guesswork or experience alone, but on precise process standards and testing methods.The white primed coating thickness is tightly regulated within 0.18 to 0.2 millimeters. This targeted window is a balanced threshold found after numerous practical trials. If the coating thickness is under 0.18mm, the hiding capacity will not good enough, you will see the MDF raw color, and the white primed coating color will be not uniform.But if the thickness is more than 0.2mm, the coating will be fragile, easy to crack, loses its sticking strength. We choose 0.18-0.2mm, it is the best result after so many times testing and evolution. This thickness can cover the MDF board fibre imprints and slight color difference. At the same time, the coating will be not easy to crack and fall off, with good adhesive. Paired with the fiber rigidifying process and two-stage abrasive finishing mentioned earlier, the white primed coating and raw MDF moulding will stick film, has strong mechanical interlocking. The white primed coating will keep stable performance, resistant to cracking or flaking, even when knock it.

5.The Complete Chain of the Process Flow
When assembled in sequence, the full white primed surface finish workflow will be: raw board check → first time gesso coating → sanding and brushing → second time gesso coating → sanding and brushing→ water-base primer paiting → drying → cooling → quality check → packing.Every stage within this workflow demands dedicated equipment setup, precise parameter tuning, time allocation and workforce input. The mill is not merely adding a covering layer. Instead, via a stack of successive operations, it converts the surface state from “micro rough” to “flawless when viewed at macro scale”. Throughout this procedure, the coating stays slim yet long-lasting, maintains robust attachment, and withstands cracking.Factors including applied pressure, cycle counts and abrasive grain grade matter greatly in brushing and abrasive smoothing work. Post first-coat smoothing normally uses coarser abrasives to trim elevated hardened fibres. The smoothing step after the second coat adopts finer abrasives to refine surface texture, building an even foundation ready for the third coat. We skip smoothing on the third coat to keep the sealing film intact and avoid exposing the underlying substance. These subtle details may escape ordinary observers, yet seasoned specialists in this trade can identify them immediately by touch. An experienced installer can assess the quality of the finish simply by running a hand over the molding and making a quick scratch with a fingernail. The factory’s craftsmanship stands up to this kind of scrutiny.
6.Manufacturing Capabilities Behind the Craftsmanship
Surface refinement might look like nothing more than “applying putty and abrasive treatment”, yet it actually mirrors a mill’s overall manufacturing competence. To start with, steady raw material sourcing is mandatory. Batch variations in calcium powder, binders, covering compounds or abrasives are all capable of triggering variations in surface finish quality. Next, the line relies on experienced operators and equipment specialists. Settings including film thickness, binder proportions, drying heat and abrasive force need careful adjustment according to daily ambient temperature, humidity and the moisture level of the base panel. Thirdly, a strict quality assurance framework is indispensable. Prior to packing, the mill carries out random sampling tests to confirm surface flatness, uniform tone, coating bonding strength and edge condition.
Only goods satisfying every benchmark can move forward to packing. This mill can deliver such steady surface outcomes because it operates as a real production facility instead of a simple reseller. It possesses complete production lines, a dedicated technical team for machine calibration, and established quality control protocols. It can adjust coating formulas and surface treatment methods for different clients and recommend the optimal coating thickness and topcoat system based on the climatic conditions of the client’s market. For the customer, this means receiving not just a “batch of goods,” but a proven surface finishing solution. The true value of decorative molding is realized when it is installed on the wall; at that moment, the quality of the surface finish defines the product’s entire appeal. This factory’s craftsmanship ensures that, at that critical moment, the product stands up to close visual inspection, tactile scrutiny, and the test of time.
Summary
The qualified MDF moulding products should be with stable raw material, correct specifications and good surface finish treatment. You can not evaluate the moulding product quality only by naked eye. So finding a reliable supplier is essential part to your business. Welcome contact us and we will show you what is qualified white primed MDF moulding.